A site for mining assistance for beginners and professionals!
A Guide to MSI Afterburner Features: How to Use Them
A Guide to MSI Afterburner Features: How to Use Them
One of the main goals of the MSI Afterburner utility is to adjust the settings of video cards and monitor how hardware operates as well as adjusting cooler settings. Additionally, you can use the utility to capture screenshots and video recordings of the screen.
In this guide, we will get into details of the main features and settings of this utility program.
Chapter 1. How to install MSI Afterburner
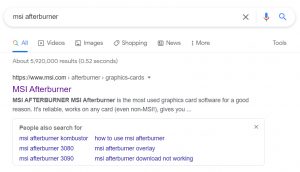
In any search engine (in our case, it was Google), search for MSI Afterburner and go to the official website of the manufacturer. You will find the download button under the image of the MSI Afterburner software. Download the archive.
Inside the archive, you will find the installer. Decompress and launch it.
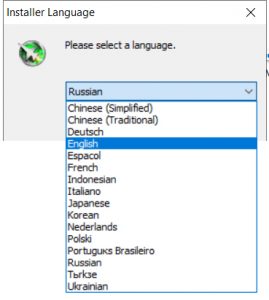
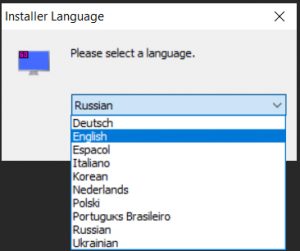
In the list of available languages, select English. Then, tick the boxes to confirm that you accept the license agreement. Note that two apps will be installed on your device: one for adjusting video card settings and another to monitor its performance.
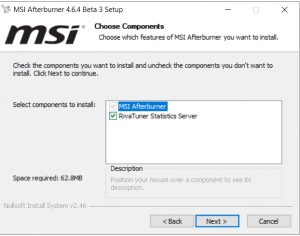
Both apps are chosen by default. If they are not, tick the boxes as shown on the image and press “Next”. If necessary, choose the directory for installation. The size of the app is relatively small so you won’t have to worry about disk space.
During the second stage of the installation process, the RiverTuner Statistics utility will be installed. It is the app that conducts monitoring. Again, choose the English language.
Chapter 2. The interface of the program
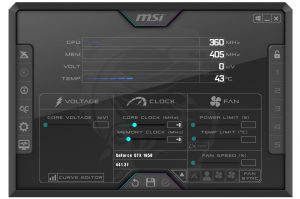
Launch the utility program using either the icon on the desktop or from the Launch menu of Windows. The default interface for version 4.6.4 looks like shown below.
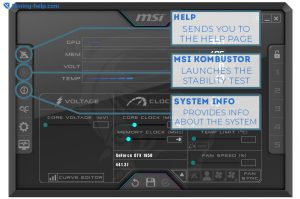
In the side panel, you will find quick tasks buttons:
- Launching stress-test app MSI Kombustor
- Help page for the utility
- Video card information
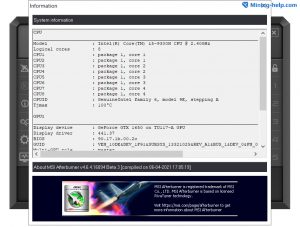
- System data
- Scanning the system
- Shortcut editor
Note that the MSI Afterburner installer does not carry the Kombustor app. You will have to download and install it separately.
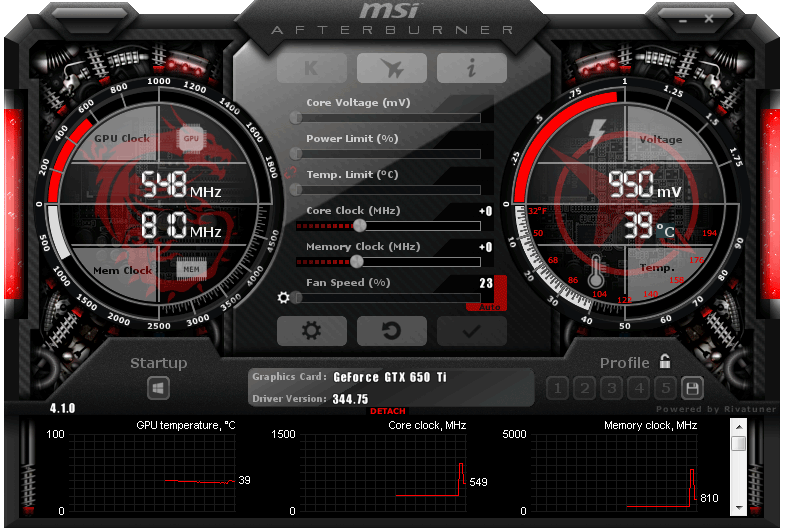
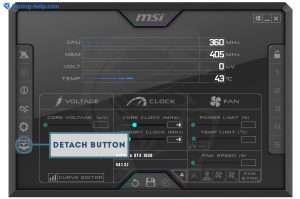
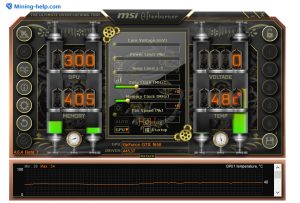
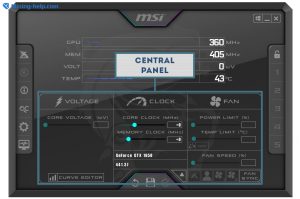
The main screen of the Afterburner app has three main gauges:
- Graphic Processor Unit and Graphic Memory
- Control panel for voltage and temperature
- Central panel for GPU monitoring
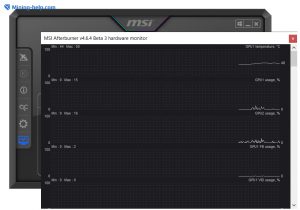
In the GPU monitoring section, you will be able to check core loads, memory bus, cooler fan speed, load limits, and system memory information. For additional details, press the “DETACH” button to summon the window with graphs for all monitored parameters of the graphic card.
In the side panel, you will also notice a small icon representing settings. This button will open the setting menu.
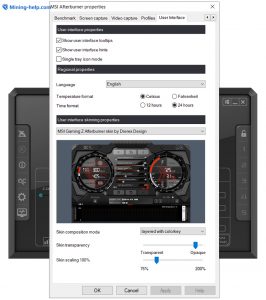
You can use interface settings menu to choose a skin. The list contains a plethora of skins from different authors. The steampunk option was chosen by our editorial steam to showcase a different look of the app compared to the default skin “MSI Mystic”.
In the lower part of the interface, you will find buttons to reset changes and to confirm settings.
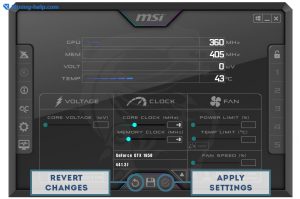
The reset button allows you to return the parameters of the graphic cards back to the condition it was in before you changed anything. Use the “Apply Settings” button to confirm any changes made.
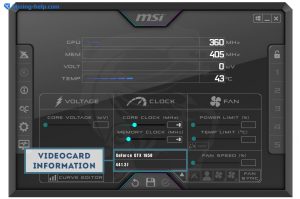
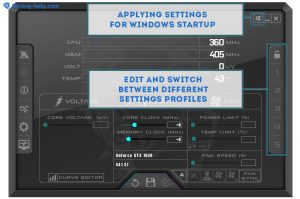
In the center of the lower panel, you will find information about your vide card including its model and firmware version. In the upper left corner, you will find a small Windows icon. Using this button will allow you to apply current settings to the OS startup. In the right side panel, you can choose from 6 different settings profiles that you can also edit to your liking.
Chapter 3. The central panel
The main parameters to which you should pay close attention are Core Clock and Memory Clock measured in MHz. These parameters reflect the frequencies of video processor and memory respectively. Using the sliders allows you to change these parameters.
Next to this section is Cooler control panel. It is called “Fan speed”. This slider can be used for hardware equipped with a custom cooling system or a microchip regulating the speed of the fan.
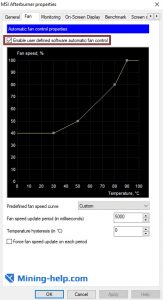
When necessary, you can create a connection between temperature and fan speed. To do so, you will need to switch to the “Fan” tab of the settings menu and select the option “enable user defined software automatic fan control”. Now, you can edit the graph and set a correlation between processor temperature and fan speed.
This feature is great when you overclock your graphic card and need additional cooling to avoid critical errors. However, don’t ever use 100% fan speed. In most cases, the fan won’t withstand such load.
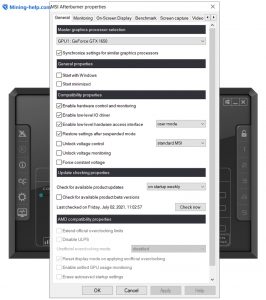
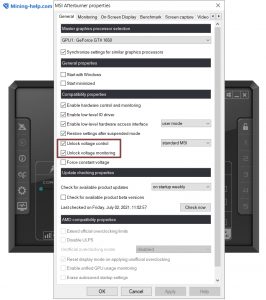
One of the most important features of this program is adjusting Core Voltage, Power Limit, and Temperature Limit values. To enable the editing of these parameters, go to “General” settings and tick the box next to “Unlock voltage control”.
Note that some video cards do not support this feature.
Chapter 4. Monitoring
RiverTuner monitoring system allows you to oversee the performance of your hardware when playing games or using other full-screen apps. To enable monitoring, go to the corresponding section of the settings and check the information that you need to know.
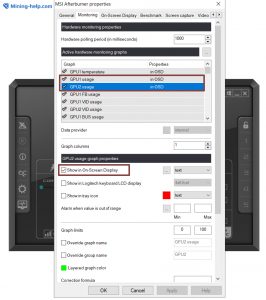
Below, you must tick the box next to “Show in On-screen Display”. Check as many data types you need.
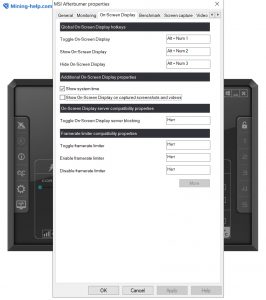
Don’t close the settings and switch to the “OSD” tab and choose shortcut for “show”, “hide”, and “toggle” on-screen data.
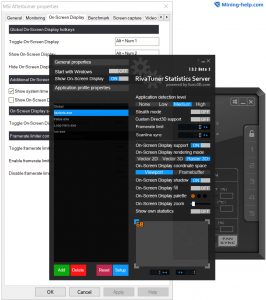
In the settings of RiverTuner that you can summon by pressing the “more” button, you can add apps and libraries for monitoring purposes. Other features allow you to tweak the monitoring. Turn on Show-on-Screen Display, On-screen Display shadow, and Show own statistics.
Use On-screen Display palette to choose the color of the text used for overlay. Use the On-Screen Zoom slider to adjust the size of the font.
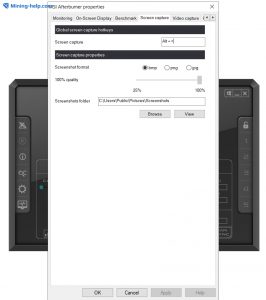
Chapter 5. Screen capturing
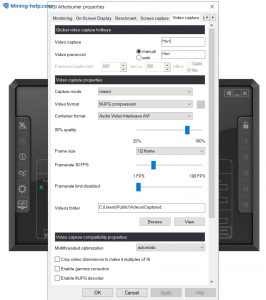
Open the settings and go to the “video capture” tab. The default compression method is MJPG which is fine. Don’t touch this option. To capture the whole screen, choose the full-screen option.
Capturing a 60fps video is an insurmountable task for an average PC. If you don’t have a gaming rig, leave the value at 30fps or less. Then, choose the folder to which captured video will be saved.
Choose the shortcut. Pressing it once will start video recording. Pressing it the second time stops the recording and saves the video to a selected folder. If the quality of the video is subpar or you notice jittering, reduce the fps again.

In the “screen capture” tab, choose the shortcut for creating a screen capture. The image in a selected format will be saved to the folder.
Author: Site Moderator
4 July at 0:28
Rate the article on a 5-point scale
Leave a comment (0)

No comments yet! But you can change that
More articles/news
4 July at 0:28
309
5 November at 17:42
5749
12 August at 14:05
5105
7 August at 12:37
6709
Categories
Currency Rate
Miners Online

Be in the know!
We promise only interesting articles! We don't like spam ourselves :)