A site for mining assistance for beginners and professionals!
How to Install and Operate Hive OS in 2021
How to Install and Operate Hive OS in 2021
An operating system is what determines the efficiency and simplicity of working on and managing a mining farm. One of the best solutions in the market is Hive OS — a specialized software based on Linux and Ubuntu.
This system is a complex of multiple critically important tools for farm management. We will take apart the installation process and how to manage your farm using this system.
How to save Hive OS 2.0 on a USB stick?
Download necessary files from the official website hiveos.farm. Use the “install” button on the website and choose the right package of files.
Choose the right installation package based on your own equipment and ASIC devices.
- Beta Image — the latest version with minor bugs and potential issues.
- Stable Version — the latest stable version of the software that does not have critical issues.
- AMD Vega — a specialized version of the software for ASIC units based on Vega 56/64.
Download directly by using the “ZIP” button. The downloading will start immediately. If you want to use P2P networks, use the torrent file.
Note that for the whole system, you will need a USB stick with at least 8Gb capacity. You can use either a USB drive or an SSD drive with a USB interface. Then, unpack the archives directly o the flash drive.
You can copy the files from your USB stick to the ASIC unit directly but it will work just fine without it. Using an SSD is a preferable option since it works much faster.
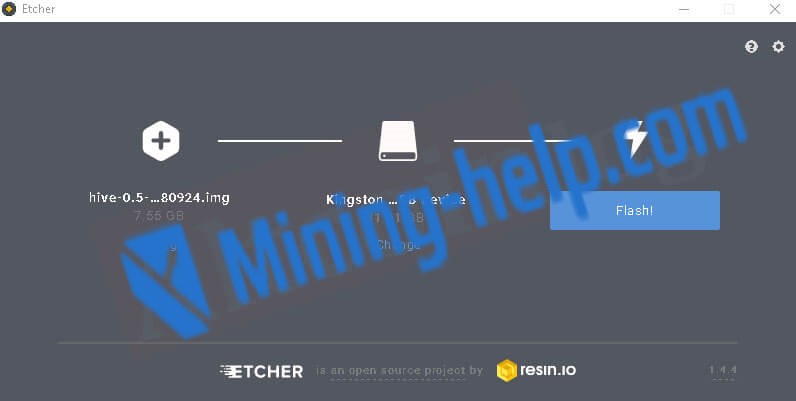
If you want to add a Windows device, you will need an additional piece of software. We will be using Etcher (etcher.io). It is one of the best utility programs for continuous file writing and the prevention of errors. There is other similar software such as Win32 Disk Imager or Rufus.
To write the necessary data, unpack the archives and set a new directory for Etcher. Then, use the “Flash” button to start the process. Note that flashing will destroy all other information on the disk.
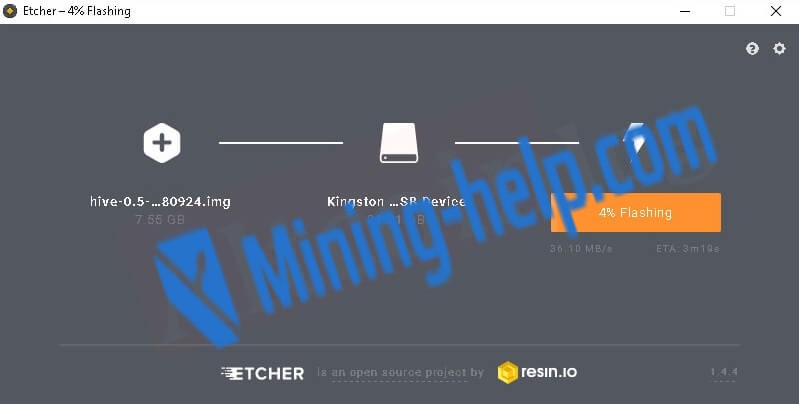
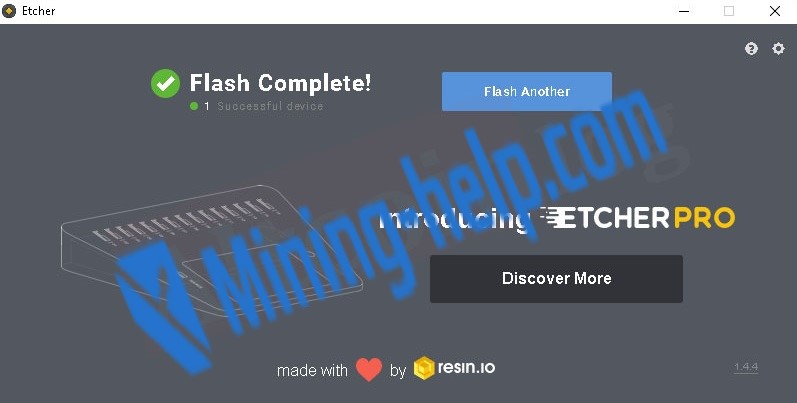
The whole process of writing data usually takes less than 10 minutes. The speed depends on the performance of your rig and the speed of the memory device. Etcher will show you every step of the procedure.
After completion, Etcher will start verifying files:
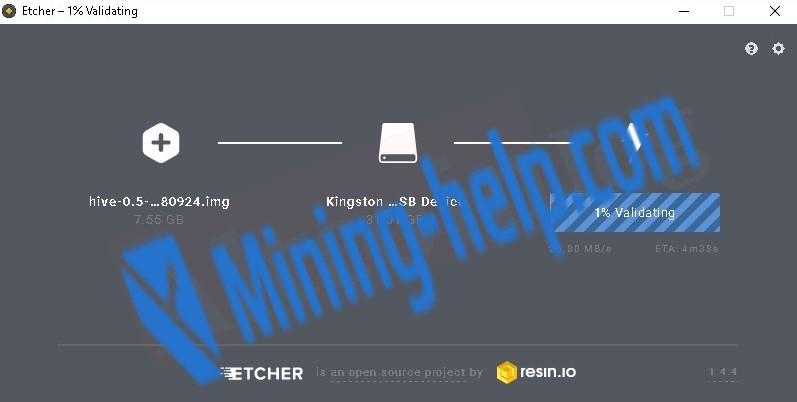
The program will notify about the successful completion of all tasks:
The prepared device with Hive OS onboard must be connected to ASIC using a free USB port. Then, start the device. Enter BIOS and choose booting from an external USB drive. Then, the system will automatically perform initial configuring and ask you to enter your user data.
YOU CAN GET the ID and password from hiveos.farm where you need to create a worker ID.
Registration at Hiveos.farm and creating an account
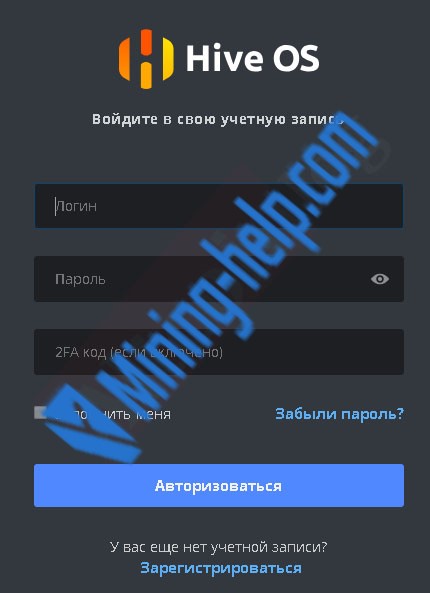
On the official website, create a new account. Make sure that you are using a strong password and that 2FA is turned on. Both these measures will help you protect your data and prevent unauthorized access to your devices. Use the “Sign in” button to enter the account.
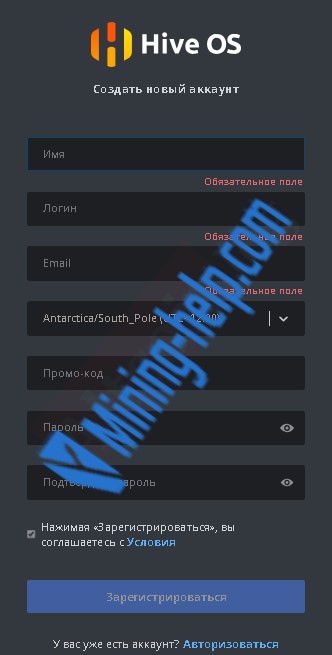
The registration process won’t take much time and requires only the bare minimum of personal information from you. First, enter your login, e-mail, and password. You can also choose your time and date.
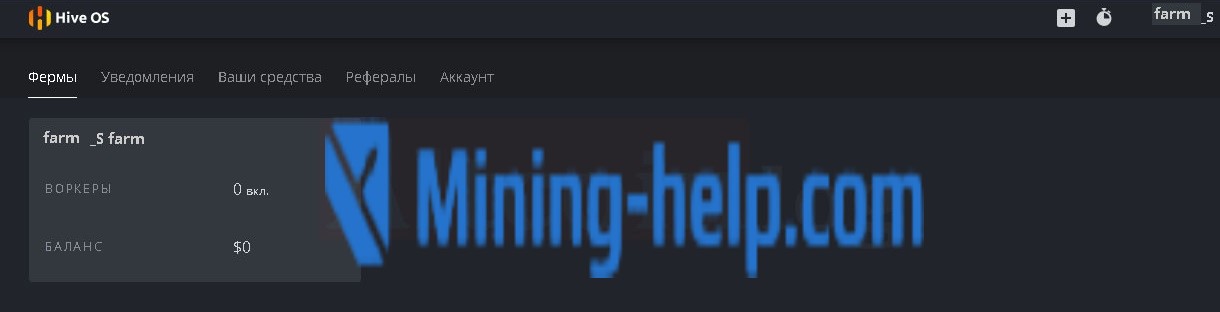
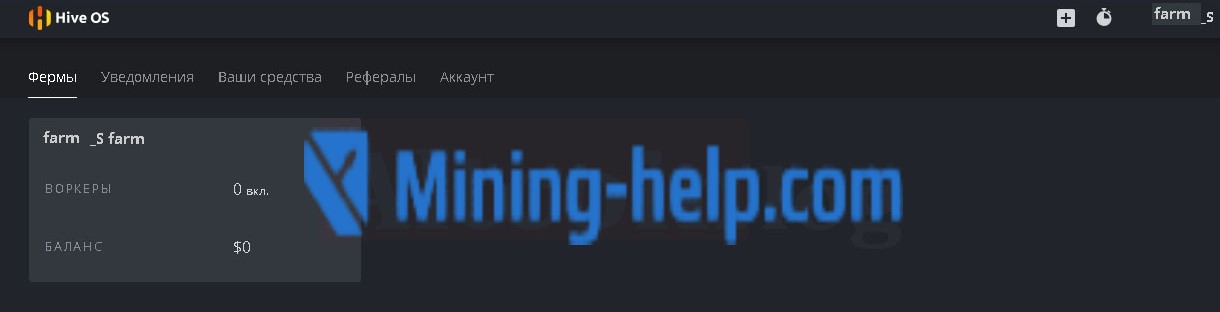
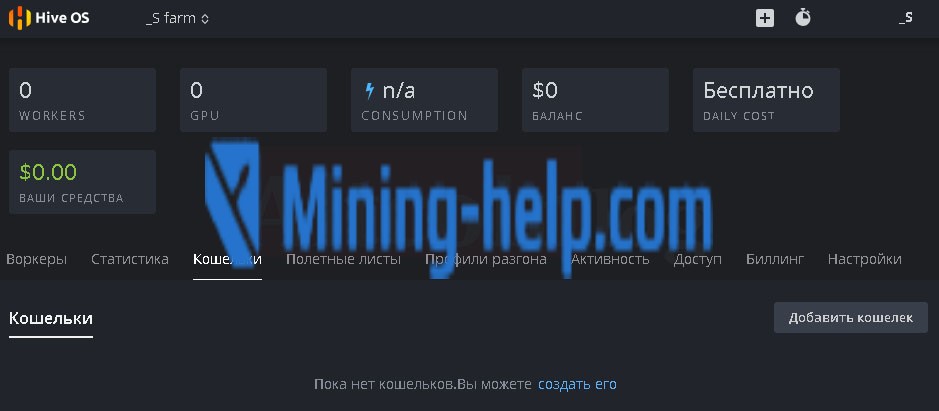
In the account management page, you will see your balance and equipment status.
Setting up 2FA is the first and foremost concern for any farmer. You need to worry about your personal data and security. Turn this option on using the slider.

Now, create a worker ID. It is a special ID assigned to each ASIC-unit or any other device connected to the system. Click on the workspace to open window where you can adjust settings.
The functionality of this window is quite wide and allows you to perform a plethora of various operations:
Create a worker ID — here you can create a specialized ID for any device connected to the system.
View statistics of the whole farm or separate devices.
Create wallets where addresses for mined coins will be stored.
Create Flight Lists with information regarding mining settings for different devices.
View special Profiles used for adjusting settings of devices.
View history of events relevant to your account and users with access.
You can edit your account and manage payments that you will have to make to work with three or more devices simultaneously.
Note that password recovery is done by sending you a special token to the backup e-mail. If you have 2FA turned on, you won’t be able to recover access without accessing your device.
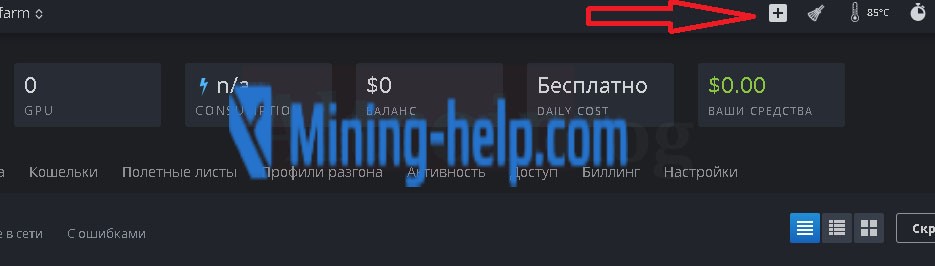
To create a worker ID, use the plus icon in the upper right corner of the interface.
Now, use the first menu option “Add a worker”:

Each device has a special worker ID in the system. A new device must be configured based on its equipment.

Now, you will see a special window where you will see ASIC ID, its password, and FARM_HASH.
Note that you will need to save this information. Write it down and store it for safekeeping. You won’t be able to connect to the system without these credentials.
Create new wallets where the information about addresses is stored. All mined coins will be sent to corresponding wallets. Find the wallet creation menu in the upper left part of the “Farms” available at the.hiveos.farm/farms. Here, you will need to use the “Add a wallet” option to open a new window.
In the list of cryptocurrencies, find the coin and enter the address. Note that the list contains a plethora of coins and some abbreviations are similar. Be attentive.
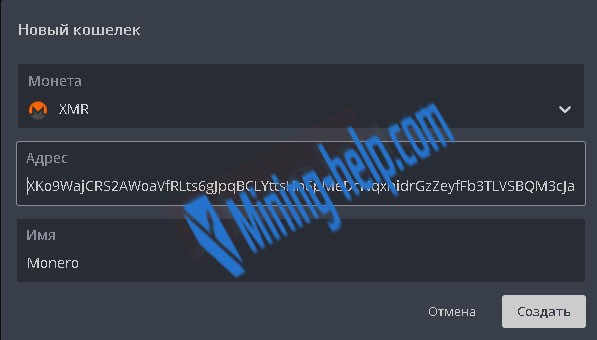
If you added incorrect information by mistake, don’t worry. You can edit your wallets at any moment.
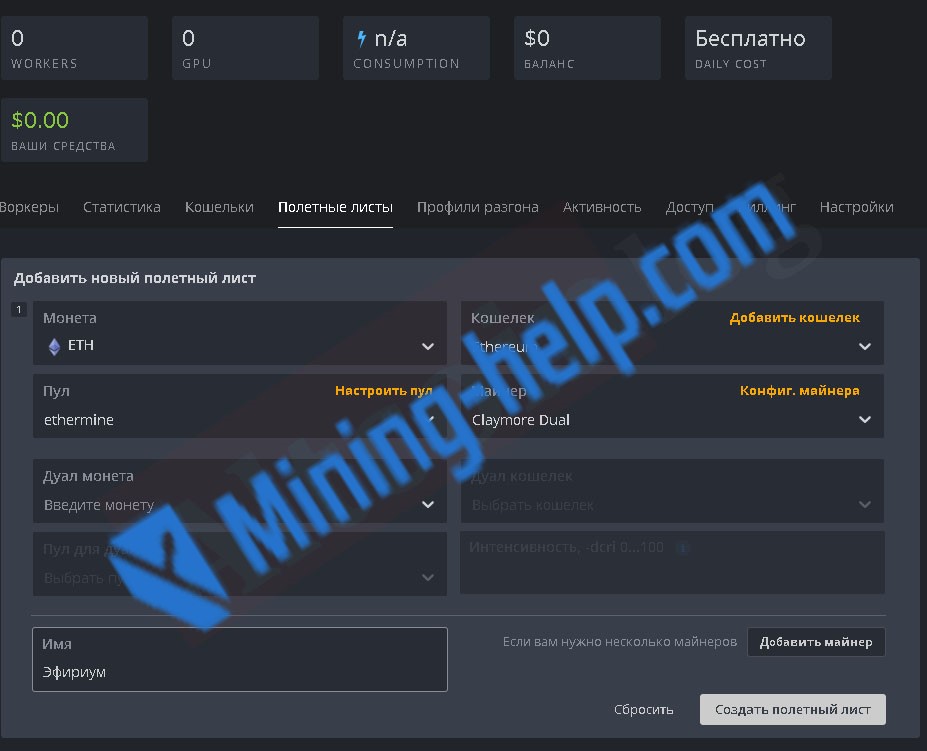
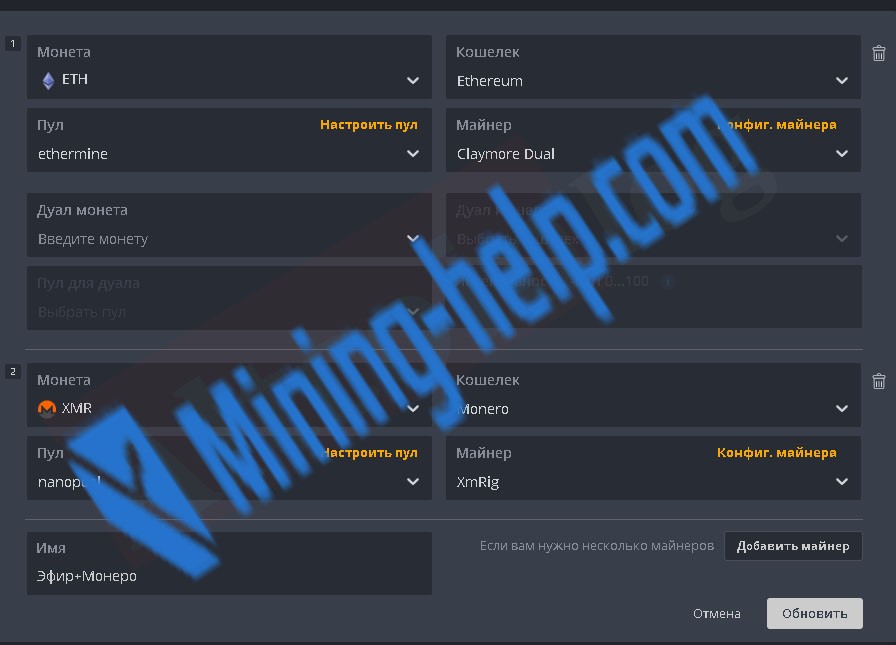
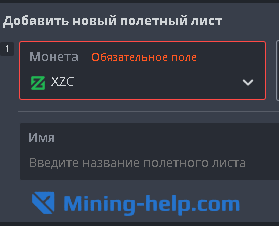
Setting up mining is much harder. You will need to create special Flight Lists with information about the mining process:
Determine the cryptocurrency algorithm;
Choose the wallet;
Find the best pool and closest servers;
Choose the miner;
Name the flight list as you wish.
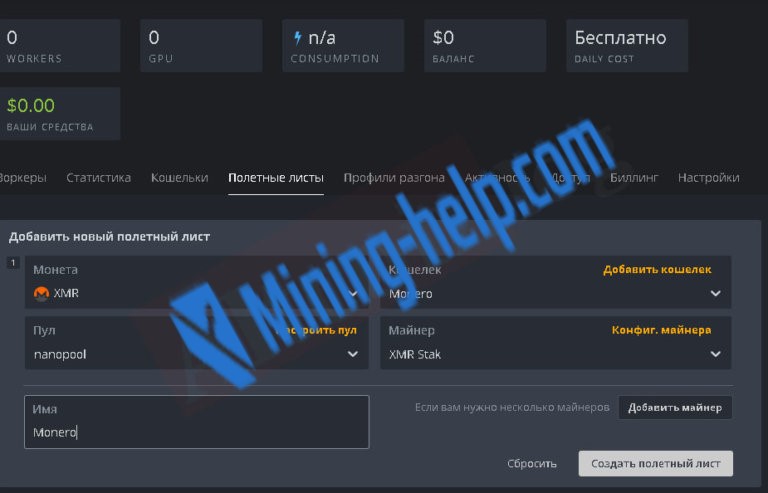
At the bottom of the window, you will see a “Create a flight list” button. After filling in all the fields, use the button to create a new flight list.
Choosing the right miner
Miners are specialized programs created to optimize the mining process and responsible for the performance of equipment. The right miner will make the mining process productive. The wrong miner may just spend your time.
One of the advantages of Hive OS is that it has a plethora of preset miners that you can use. They are available for choosing in a separate list.
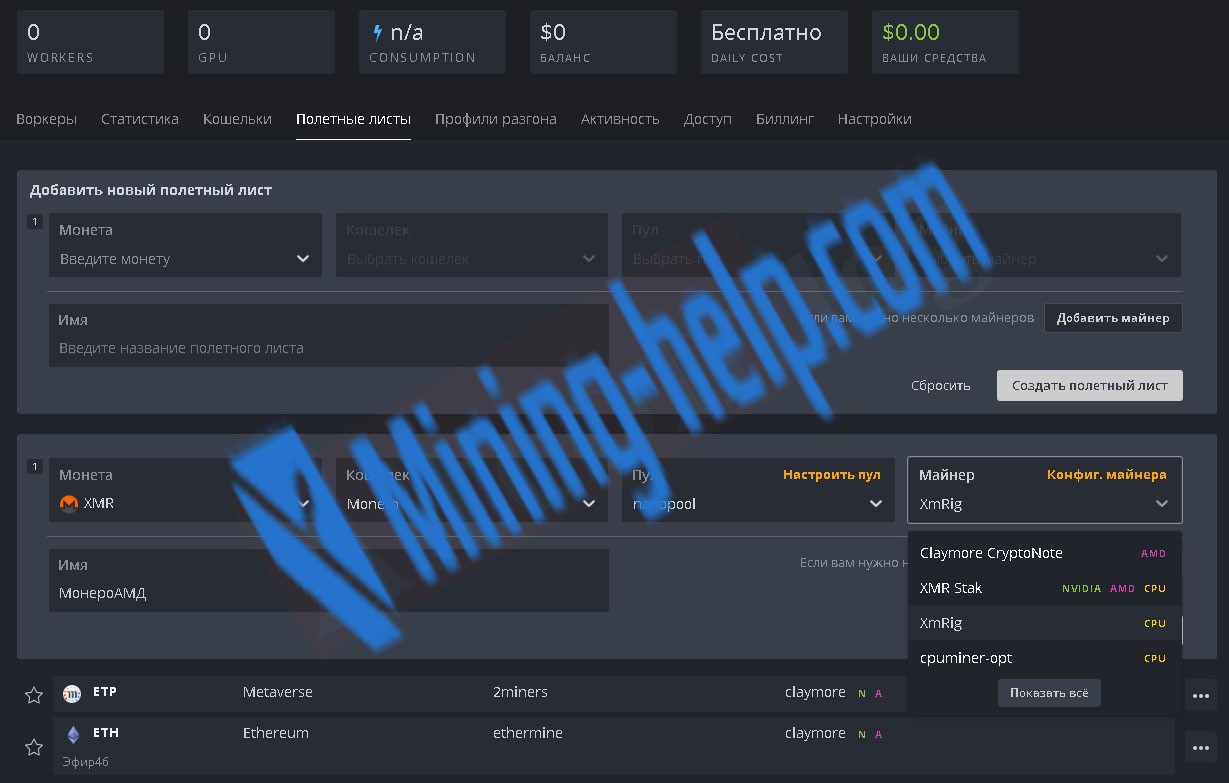
There is a special menu where you can use the option to utilize both the processor and the graphic card to mine coins. Check the necessary equipment on the list.
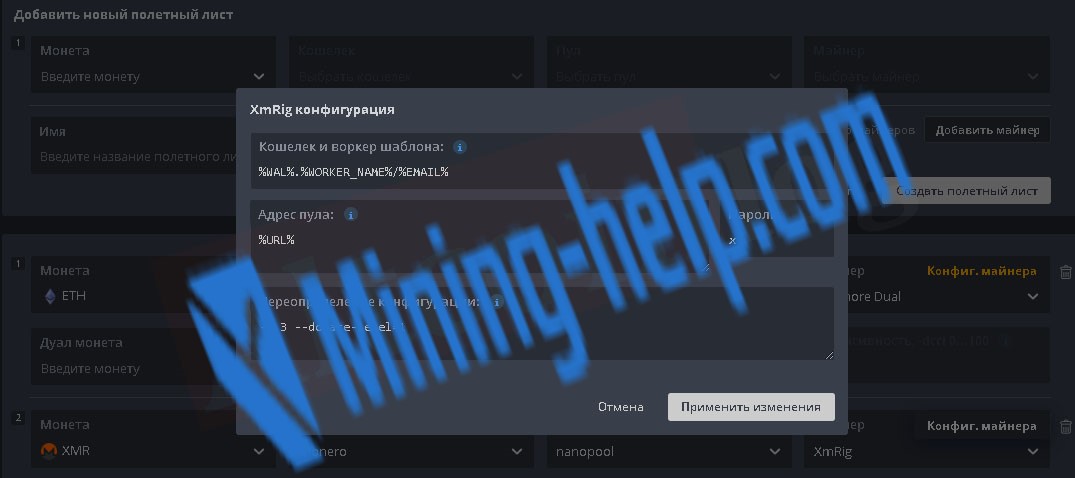
For Claymore Dual, you need to use a specialized configuration. It depends on the type of cryptocurrency that you want to mine.
When necessary, you can fine-tune the hardware. If you want to configure a device, use the “Miner Configuration” button and open a window where you can edit settings.
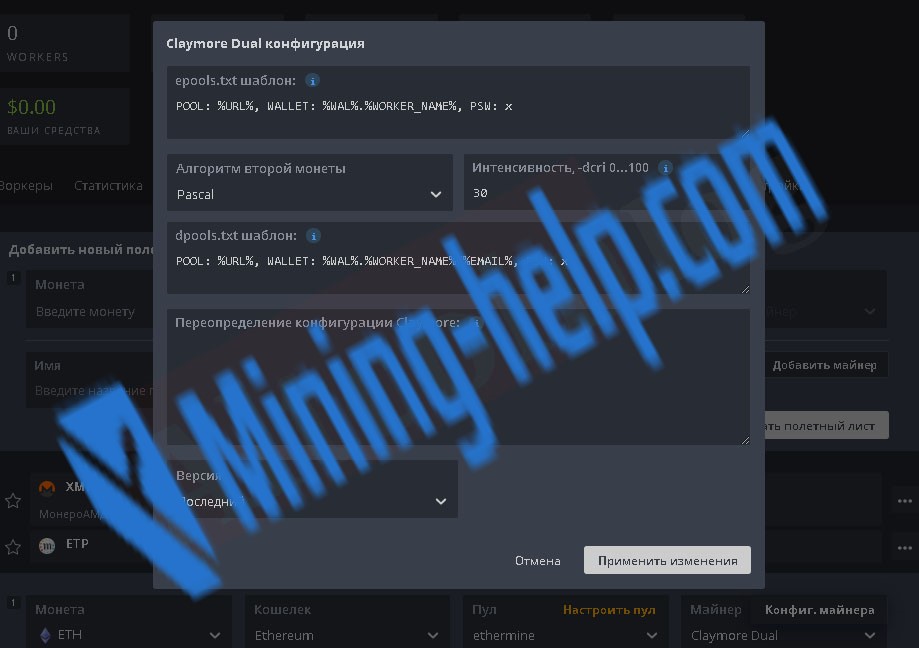
AtApplyatusing the bottom of the window, you will see a button that saves all of the changes made during the editing process.
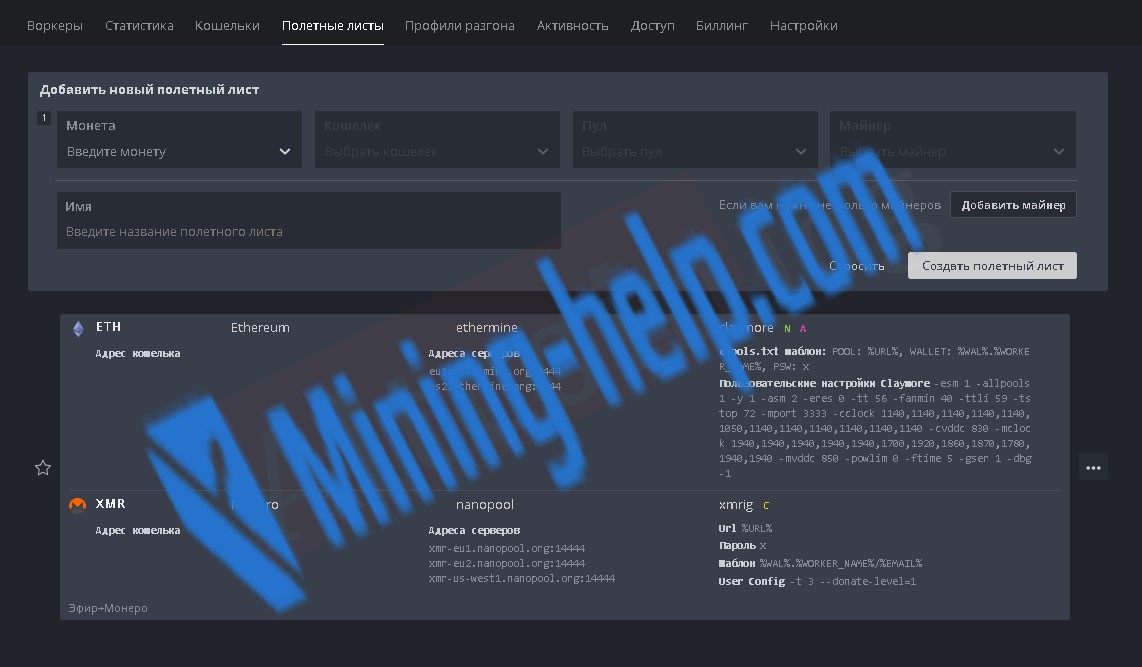
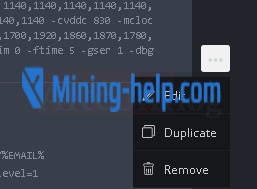
Editing the flight list can be done by pressing the menu icon and choosing the “EDIT” option.
Note that Hive OS has a selection of presets that you can use for various types of mining. The window of preset editor can be summoned by clicking on the configuration field for miners.
Here is the process of editing the settings of hardware (in our case, processor) when mining Monero:
Any changes made must be saved by using the button “Apple settings”. The button is situated in the bottom of the window.
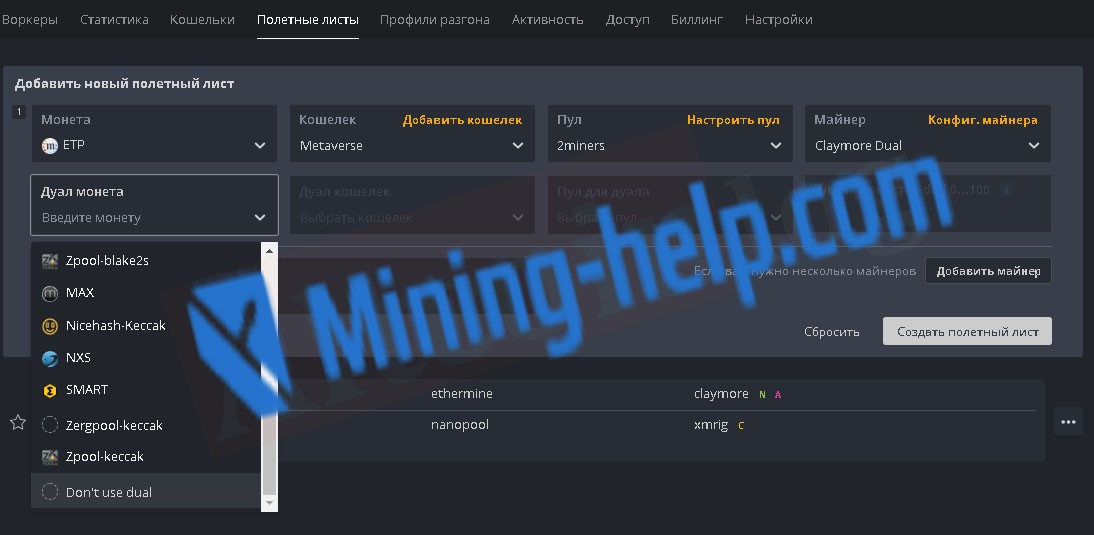
When you need to mine Metaverse, create a new flight list and choose the ETP algorithm from the list.
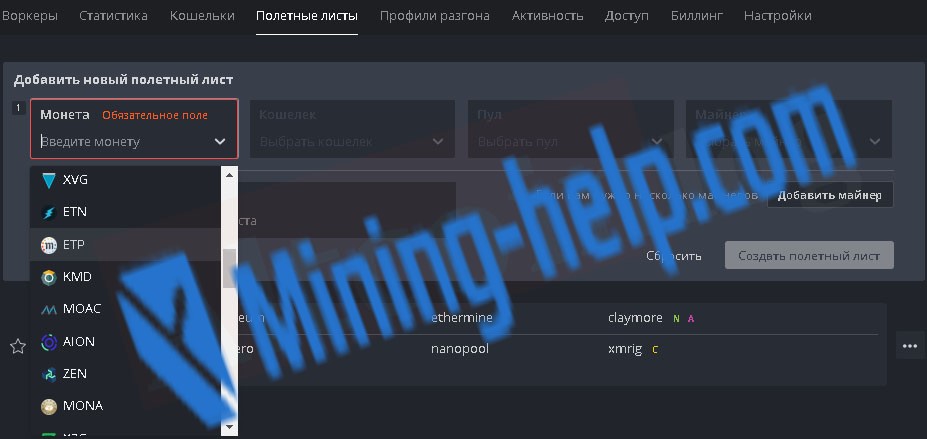
Editing settings is done next. The procedure is described prior. Don’t forget to use the right wallet, pool, and miner. If you need to use only graphic cards, use the option “don’t use dual”.
Mining Lyra2z can be done the same way: create a new flight list and choose the corresponding mining algorithm from the list.
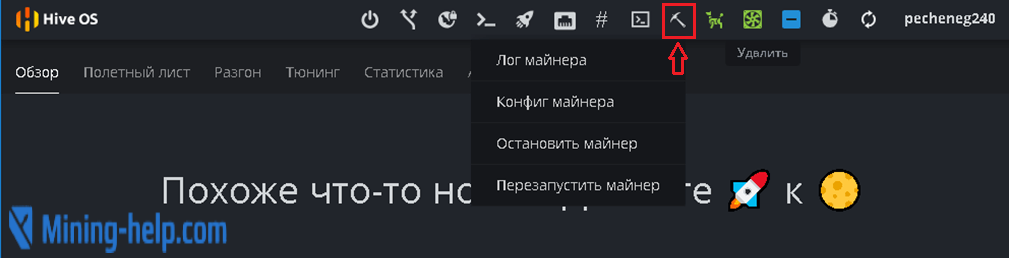
If you want to change the algorithm, you need to stop mining. Any device connected to the system can be stopped sing the menu item “Stop miner”.

After the halt of the process, you can start editing settings. Special prompts for the console are “miner start” and “miner stop” to initiate or halt the mining process respectively. Then, you can use other commands such as:
Reboot — reboot the device;
Screboot — forced reboot;
Screboot shutdown — forced reboot and shutdown of the device.
Activating and Synchronizing an ASIC-unit
The first launch of the ASIC unit will be fully automatic when you boot the Flash drive. After the completion of the configuration process, you will be asked to add the profile of the device to the hive OS system. Use the credentials from your account.
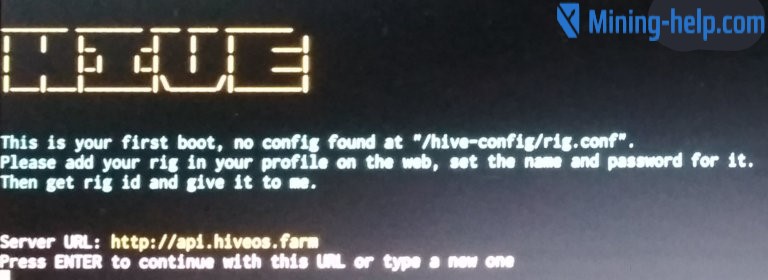
By default, the system will choose the api.hiveos.farm serverUndervoltageASIC unitPress enter to turn on the device and connect it to the hive OS system.
Tuning profiles for Nvidia and AMD
Video cards from these manufacturers can be fine-tuned using these profiles. You can create custom ones.
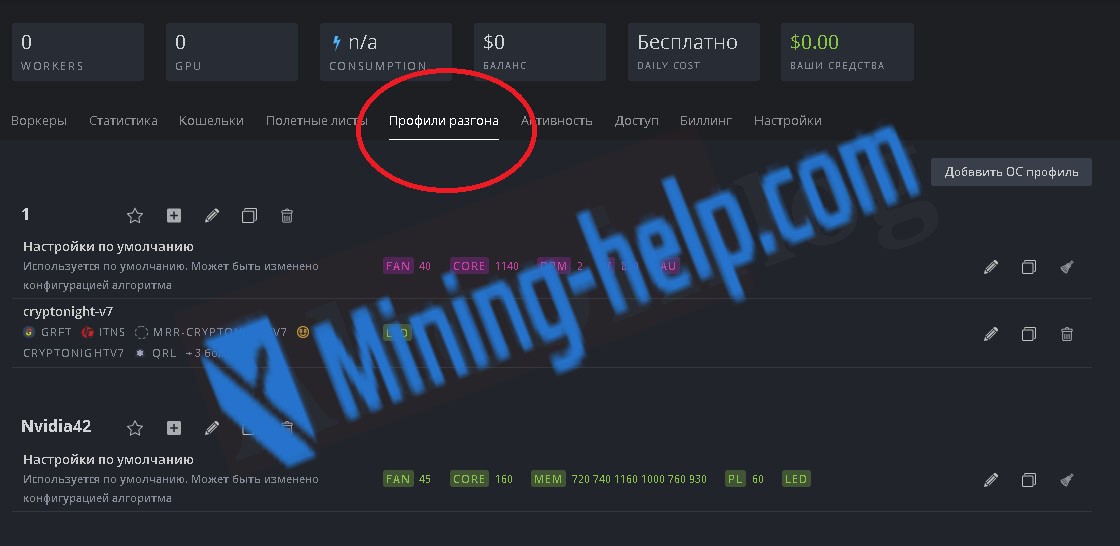
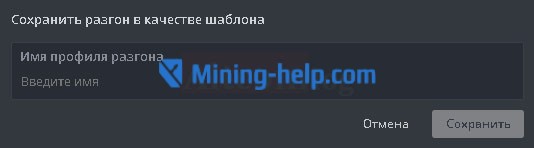
Different types of algorithms require specific tuning. You can create an unlimited number of profiles to tune your hardware. Make sure to name them accordingly.
Use the “EDIT” button and add data to the fields. You can change core and memory frequencies, power limits, and fan speed.
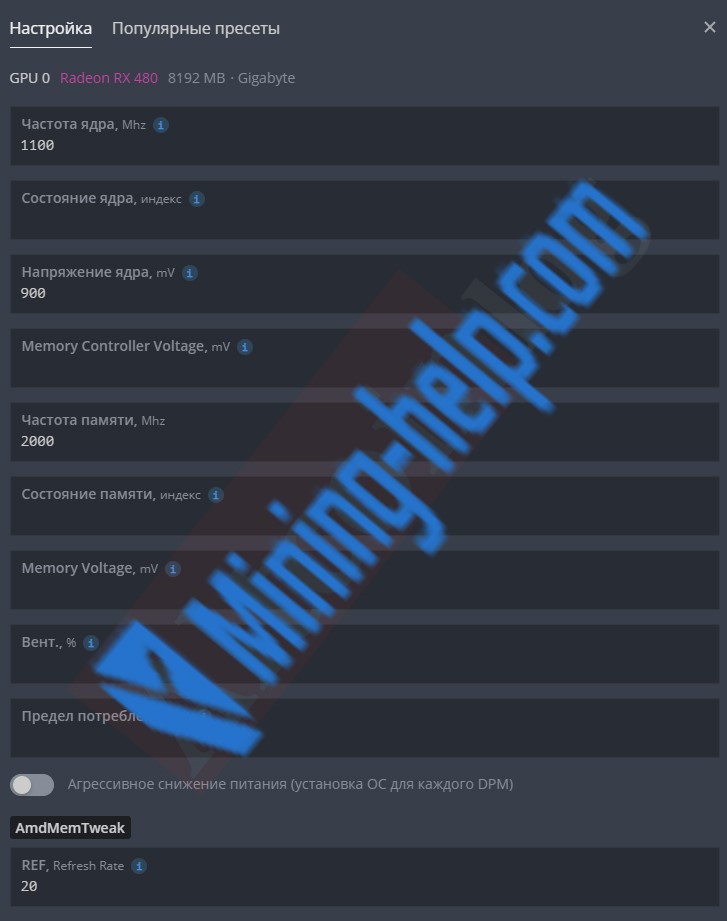
Note that there are presets for AMD and Nvidia. For example, AMD cards need specific settings.
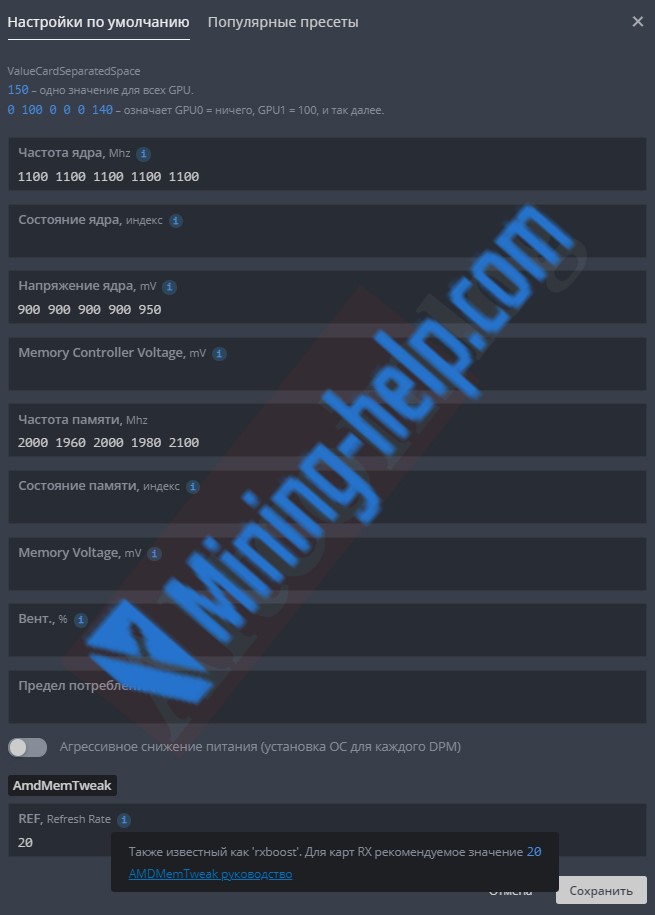
You won’t see any particular differences from standard utility programs for Windows. However, when using Nvidia don’t forget to set double the frequency of the core compared to when you use it on your PC.
AMD power limits can be adjusted by choosing different core states. You can use the “1” value to minimize power consumption and “2” to achieve maximum performance.
Try to avoid standard mistakes for AMD and Nvidia tuning. For example, high frequencies can damage hardware while insufficient power will definitely lead to weak performance. The latter often happens to AMD cards.
When using hardware, you can encounter other errors with the hardware. In the vast majority of cases, the reason is BIOS or undervoltage. Issues with other parts of the ASIC-unit can be problematic as well and cause errors.
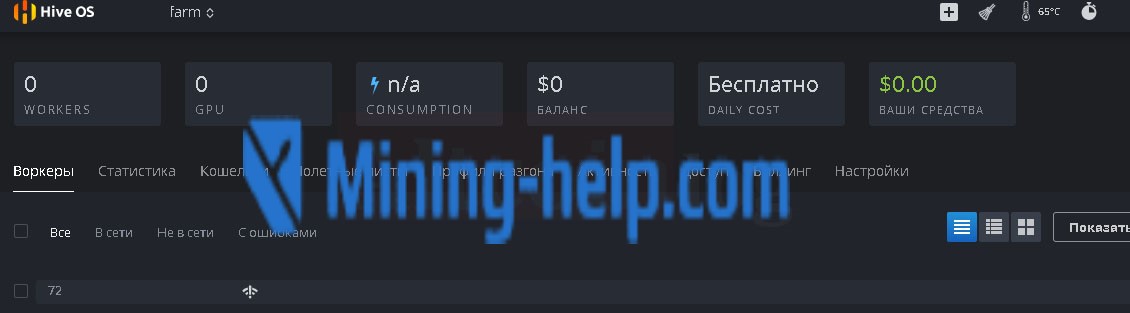
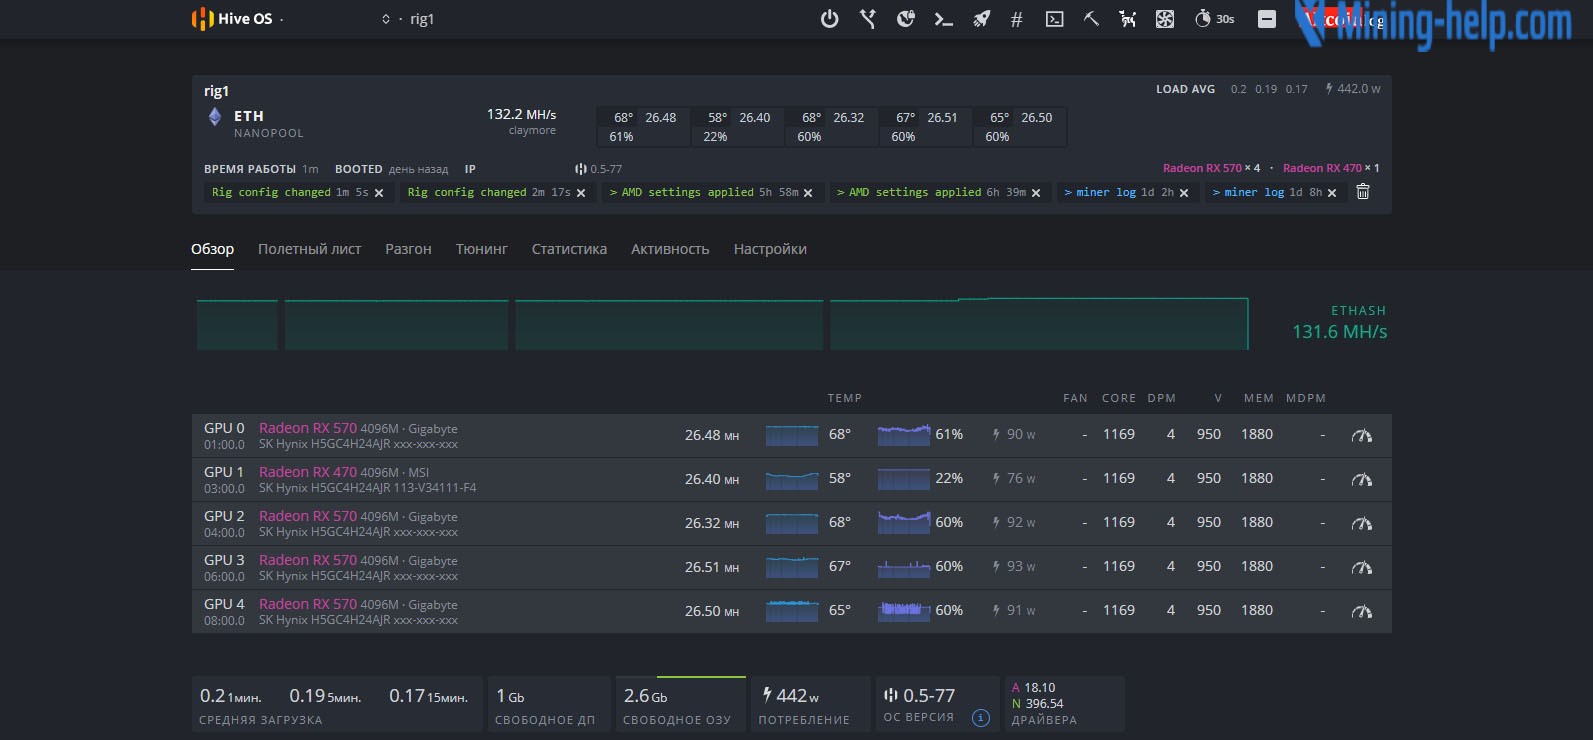
Managing devices connected to Hive OS
You will spend the vast majority of your managing time in the Hive OS web interface. It gives you total control over your equipment. In the uppermost panel, you will find a row of icons.
![]()
The functionality of some of the buttons:
Turn on and turn off the device;
Network settings of the device (you can turn on VPN here);
Open the Linux prompt;
Initiate mining;
Manage device’s console;
Manage the miner;
Turn on the Watchdog system;
View temperature and fan speed.
Управление включением и отключением;
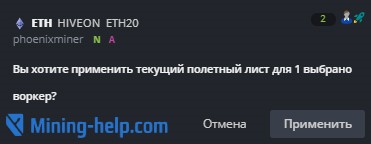
The rocket icon will open the list of flight lists that can be used on this device.
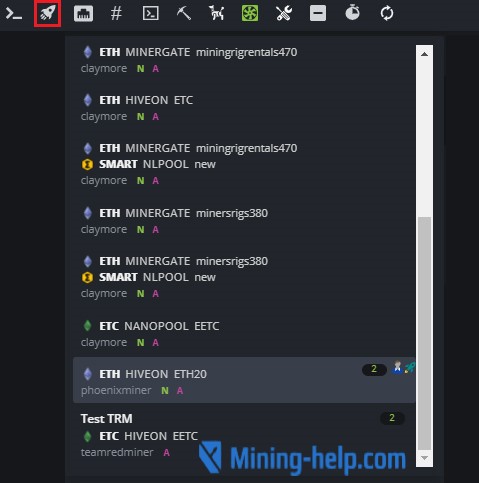
Then, choose the settings preset and use the “Apply” button.
In the menu of the device, you will see various data regarding the status of the hardware. You can view video cards, performance, and other information that you may find important.
After changing the configuration of the hardware onboard of the ASIC unit or if you want to change the system settings, you can go to the account management page and find the farm. Then, delete it, using the “minus” icon in the right upper corner of the interface.
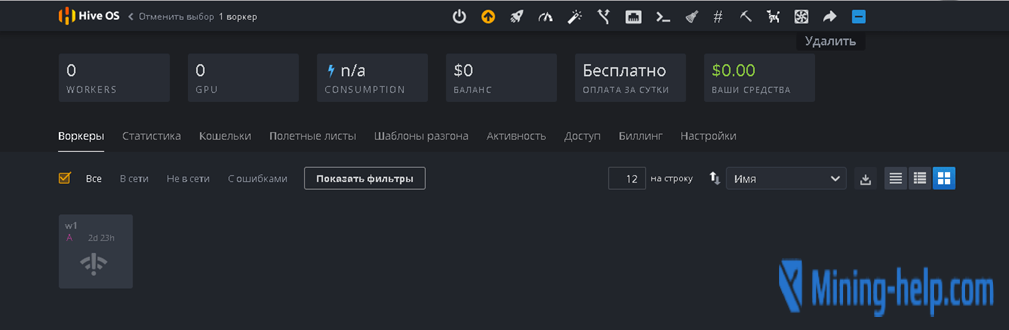
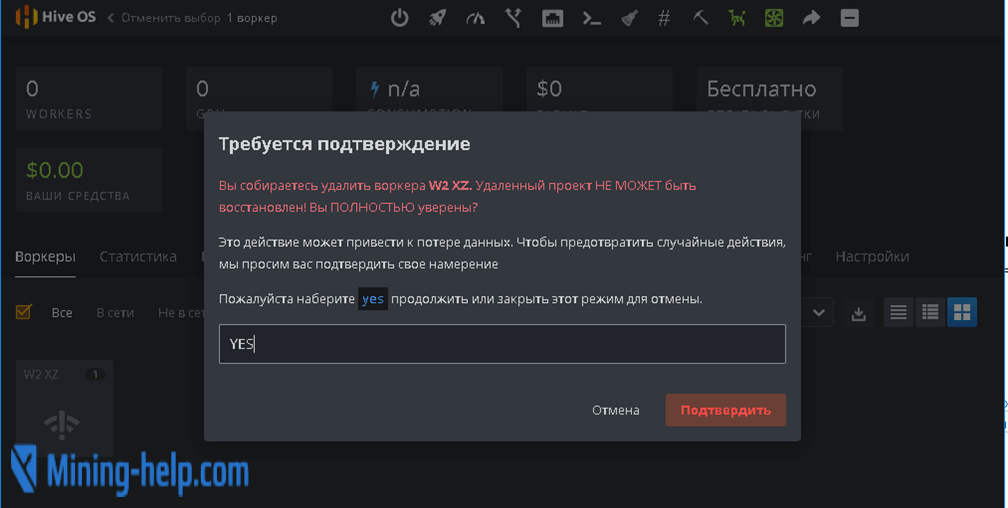
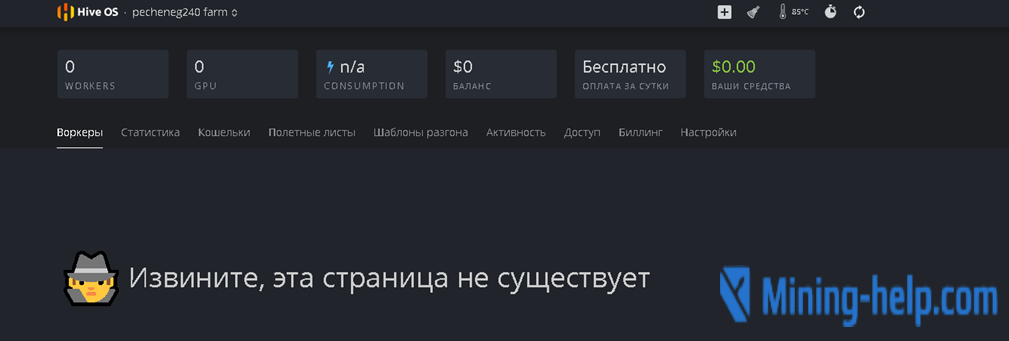
Now, your worker is disconnected from the system. Use new settings and reconnect them by creating a new worker ID. If you want to remove the farm completely, use the button “delete farm” at the bottom of the window.
Note that farms also contain all the wallets and tuning profiles as well as flight lists. If you delete it, you will have to create them again for a new farm.
You can also use a WiFi connection. Use the prompt “wifi” in the console and enter SSID and PASS values to connect to the network. If the farm remains offline or the wifi adapter is invisible, it means that the system did not find the adapter. Some wifi-adapters are incompatible with Linux and there is nothing you can do about it. In any case, using a cable connection is way more efficient.
Security
Set up 2FA (two-factor authentication). In the console, you can use the prompt “hive-passwd “yourpassword” where “yourpassword” must be replaced with a strong password.
Use a separate SSH port for your password. By default, the system uses SSH 22 but you can switch it to 2222. Also, don’t forget to turn off “ShellInABox” option when using default passwords.
Shell updating
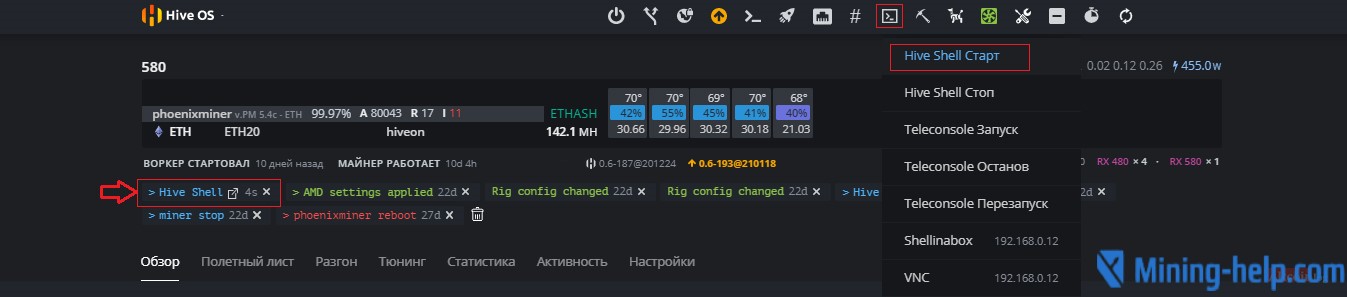
Since 2019, Hive OS has been using an integrated TeleConsole system. However, various compatibility issues forced the team to develop their console. Now, you can use Hive Shell that has virtually the same functionality as TeleConsole. Use the prompt “Hive Shell Start” to initiate the console.
Now, you can also use remote control. However, don’t give away the link to just anybody. The link allows total control over your devices.
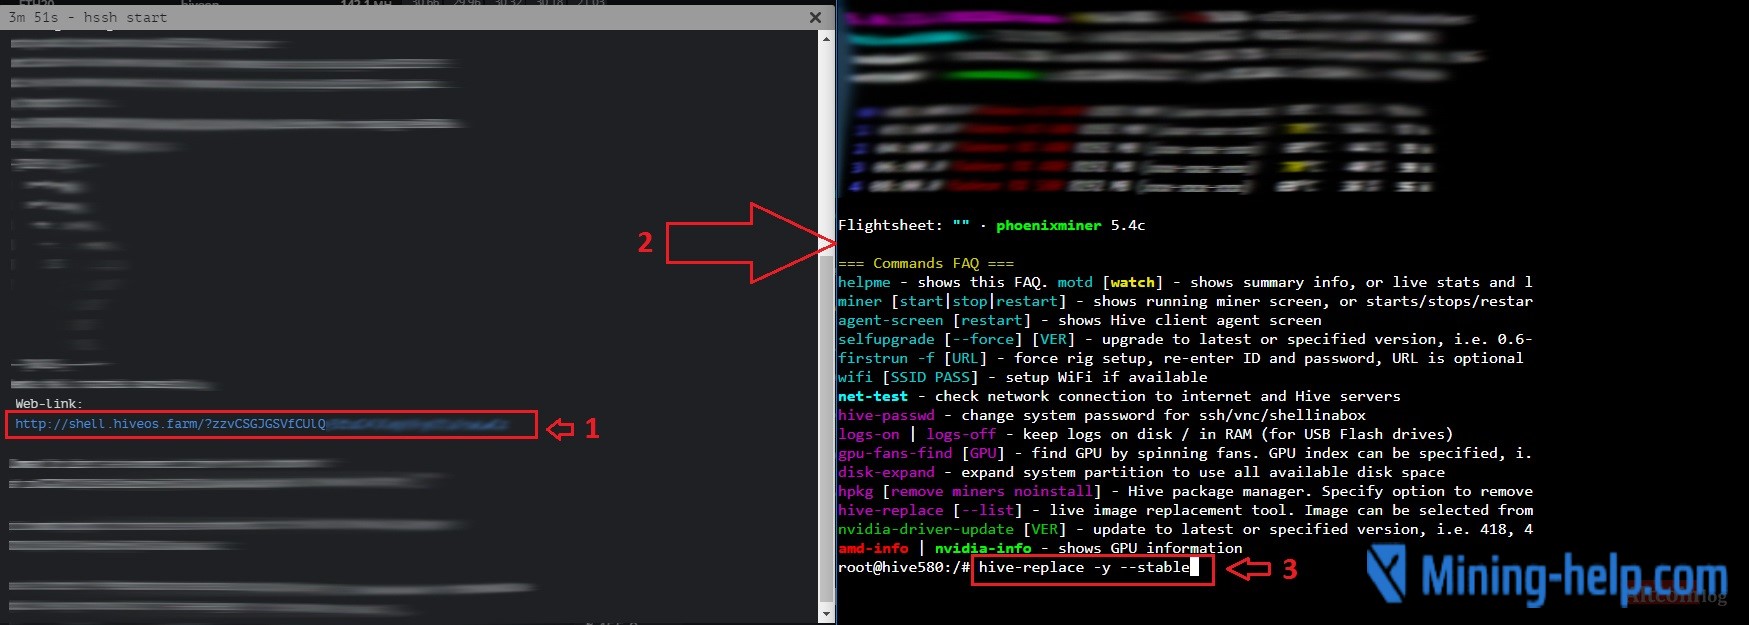
The Shell is regularly updated and supports more and more software, miners, and hardware. Existing bugs are usually addressed quickly and removed in the next update. To update the system, go to the worker menu and use the prompt “hive-replace -y -stable” to update the software version.
When the update completes, reboot the device and only then continue mining. Note that a new update may have updated versions of miners. It is a good idea to use the latest miner version to improve the mining efficiency. Update your flight lists before restarting the mining process.
Frequently used prompts for Hive OS
While the vast majority of people use the GUI to manage their farms due to convenience, there are special console commands for those who want to maximize the efficiency of the management process. Many miners want to be a little bit more flexible with their work. The prompts below will most certainly help you out.
| Prompt | Description |
| miner | View the miner |
| miner start (stop) | Start or stop the mining process |
| miner config | View miner configuration |
| sreboot | Reboot |
| sreboot shutdown | Reboot and shutdown |
| dmesg | View system messages |
| ifconfig | Network interfaces |
| iwconfig | Available WiFi adapters |
| net-test | Network status |
| top -b -n 1 | View ongoing processes |
| wd status | Status of timer |
| timedatectl | Sync time
|
Prompts for AMD devices:
| Prompt | Description |
| amd-info | View AMD cards info |
| amdcovc | View core and memory frequencies |
| wolfamdctrl -i 0- -show-voltage | View voltage in the selected core |
| chmod +x ./amd_install.sh | Download and search for new AMD drivers |
| ./amd_install.sh | Install downloaded drivers
|
Prompts for Nvidia devices:
| Prompt | Description |
| journalctl -p err | grep NVRM | View device errors |
| nvidia-driver-update 430 | Download the driver of the version… |
| nvidia-driver-update –list | List of available drivers |
| nvtool- – clocks | View core and memory frequencies |
| nvidia-driver-update | Search for a new driver |
| nvidia-driver-update –remove | Delete currently installed drivers
|
Other prompts:
| Prompt | Description |
| /hive/opt/opendev/watchdog-opendev reset | Reboot the timer |
| sreboot wakealarm 120 | Reboot the alarm |
| disk-expand -s | Expand the currently used disk space |
| hpkg list miners | List of miners |
| journalctl -u hivex- -no-pager | View the server events history |
| logs-on | Save journal logs on the drive |
| logs-off | Save journal logs in the memory |
| selfupgrade –force | Update the system |
| firstrun -f | Enter ID and password |
Hotkeys that can be quite useful are also here.
Ctrl + C — cancel the last initiated command.
Ctrl + A — close a window without stopping the process.
Ctrl + A + Space — switch between windows.
Installing OS on ASIC
Below is the long list of devices that you can install Hive OS on:
Antminer S9/S9i/S9j/S9-Hydro/S9(VNISH)/S9(mskminer)/S11;
Antminer L3+/L3++;
Antminer D3/D3(Blissz);
Antminer DR3;
Antminer A3;
Antminer T9/T9+;
Antminer Z9/Z9-Mini;
Antminer X3;
Antminer E3;
Antminer B3;
Antminer S7;
Innosilicon A9 ZMaster;
Innosilicon D9 DecredMaster;
Innosilicon S11 SiaMaster;
Zig Z1/Z1+.
Note that some of the listed devices require additional flashing with HIVEON ASIC. The software can be downloaded from the official website. Note that you need to install the Hive OS client to edit any hardware settings onboard the ASIC. If a HIVEON ASIC version exists for your device, make sure to use it.
Antminer 15/17 and S9k / S9SE will need the firmware to be installed directly in the RAM.
When the flashing process is completed, make sure to copy the FARM_HASH value and save any settings that were changed.
For other types of Antminer 3/7/9, you won’t need to do anything aside from flashing the device. However, don’t install the latest versions of the firmware since the latest versions prohibit using custom software.
Frequent issues and troubleshooting
Updating Hive Shell does not update the drivers and you will have to update them manually using console prompts.
Systematic rebooting may signal various hardware conflicts or issues with tuning. If frequencies are too high, the device may reboot more frequently. The issue may be flash drive-related. In such cases, changing the USB stick usually helps.
Network issues are usually related to the problem with connectivity. If you are using a wifi network, try using these prompts:
ping hiveos.farm — ping the server connection
mtr hiveos.farm — check for packet loss
time curl http://hiveos.farm — check HTTP ports.
In some cases, Hive OS may not see video cards onboard devices. More often than not, it is related to hardware issues. Check vulnerable parts of the device (cabling, motherboard) and update drivers.
When using an Nvidia device, you may experience issues with the sudden disappearance of settings and information. Using the prompt apt-get install —reinstall -y nvidia-settings usually helps.
Sometimes the system does not see the sixth installed video card. Mostly, it happens to builds using Nvidia cards. For the moment, there is no solution for this issue aside from switching to Windows.
Advantages and disadvantages of Hive OS
The advantages of this system can be summarized as such:
The system has an intuitive interface;
Hive OS can utilize the computational power of the devices quite well;
Installing and setting up the system won’t take much time;
You can use the remote control to manage the farm at all times;
The system supports a wide array of hardware;
The full size of the system is 8Gb;
You can talk to the support team using Telegram.
The system also has some downsides:
You can use it for free only to manage three devices or less. When using more devices, you have to pay $3 per device.
Admins theoretically have access to your devices.
The system has some security vulnerabilities.
You cannot control voltage in Nvidia cores.

Still, the system provides a rich selection of instruments to manage farms. These tools are free of charge as long as you use not more than three devices. All in all, Hive OS gives you total control over your farms!
Author: Site Moderator
12 July at 17:25
Rate the article on a 5-point scale
Leave a comment (2)

No comments yet! But you can change that
More articles/news

5 August at 23:33
432

12 July at 17:25
592
28 June at 18:19
468
Categories
Currency Rate
Miners Online

Be in the know!
We promise only interesting articles! We don't like spam ourselves :)