A site for mining assistance for beginners and professionals!
How to start mining cryptocurrency for beginners from scratch (beginning) on a video card, etc., step by step mining

I greet you friends. This first article on mining on this website (this article is constantly updated) will talk about how to start mining on a video card (GPU) and where to start. If you are too lazy to read, then at the end of the article there will soon be a video on how to start mining for beginners. But first, I advise you to read the first 2 paragraphs on how to start mining a beginner.
Start mining
This article is about mining on a video card, step by step instructions. This mining guide is for beginners. We will set up mining, connect and install software, overclock the video card, and so on.
Mining – getting started
What do we need to start mining from scratch.
Step by step mining
- The most basic thing for mining on a video card is a video card (GPU), at least one, modern, about no more than 3-4 years old, and not budgetary. (It is also possible to mine on processors, hard drives and cloud mining). If you want to choose a video card, then go here – Video Cards for Mining. The best cards are selected there, tables and top are compiled.
- Naturally, you need a computer (system unit) or a farm with an installed operating system (Windows x64), only 64-bit version .
- You need to decide on the currency that you will mine. It depends on the video card. In our example, we will be mining ether (eth). At the moment (12/28/2017) Nvidia is better suited for mining ZCASH – more on that below. Now ether.
- You need to select the pool (POOL) where we will mine ethereum (don’t confuse with etherium). Next, we select the miner program and configure it.
- You need to choose an exchange or wallet where the Ethereum coins will be received, which we will mine, and you will also need services where you can transfer your earned coins to rubles and withdraw them to the card.
Mining instruction
So, let’s begin. You have a suitable video card and all of the above listed in points 1, 2, 4, and you must have the drivers installed. If you don’t have a video card, then read the article on which video card is better to choose and buy for mining. If you don’t have video cards and equipment, read more about what equipment you need for mining – What you need for mining.
We decide which cryptocurrency to mine. Today (01/05/2020) it is profitable to mine ether on AMD Radeon and Nvidia Zcash cards. On the new Nvidia cards of the 1000 series (gtx 1060.1070), ether can also be mined well, and we will have an example of eth mining. Next, we will write examples for other cryptocurrencies. If you want to mine bitcoins (they can’t be mined on video cards), then read the article – How to mine bitcoins.
If you don’t want to set up equipment and look for video cards, there is an alternative – cloud mining, with which you can also make good money, more about this – Real cloud mining.
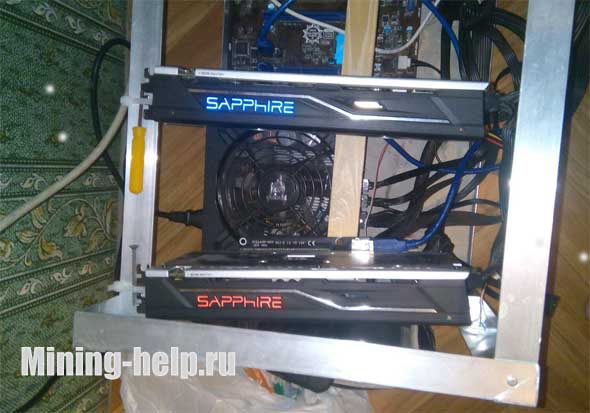
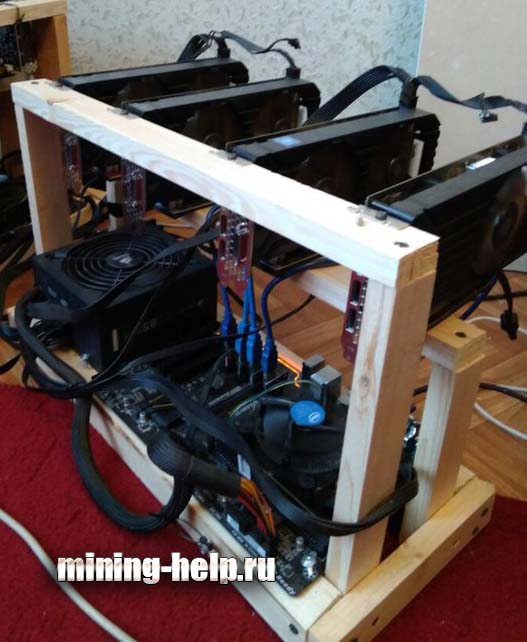
Our example will include Windows 7 x64 (by the way, ether mining is possible only on x64 bit operating systems), two AMD Radeon Sapphire RX 470 4gb video cards. The processor doesn’t matter, as does the amount of RAM, but 4 gigabytes or more is recommended. The easiest mining kit for beginners.
UPD 3 GB and lower versions of video cards are not suitable for ether mining. If you have 3gb or less, then you need to look for an alternative. There are other algorithms and currencies for mining, the full list is HERE.
Fast Internet is not needed, but with good ping. A cable connection is better than Wi-Fi, but Wi-Fi will work too (I’ll write about that later). You can also read – What kind of Internet is needed for mining.
How to start mining
We select the pool where we will mine the ether coins:
At the time of this writing, I recommend several mining pools for you
1.ethermine.org
Pros of this pool:
- + Large pool power
- + Small honest commission 1%
- + Good ping
Cons:
- Pool in English
- Slightly incomprehensible website (for beginners), but we will describe the setup using its example
- dwarfpool.com/eth
Pros:
- + they have a server in Russia which is good for ping
- + small honest commission 1%, which is not secretly overstated
- + Large pool power
- + Easy to set up the miner
Cons:
- — Slightly incomprehensible website (for beginners)
- www2.coinmine.pl/eth/
Pros:
- + Small honest commission 1%
- + Good ping
- + Good power
- + Good protection
Cons:
- — More complex miner setup
- — There are difficulties with the website too
- eth.nanopool.org/
- + Simple website
- + Easy to set up the miner
- + Good power
Cons:
- — Many argue that the stated commission of 1% is too low
A pool with less ping will be better. Read this article – Find out which ping to apply to the server pool.
At the moment I have selected and will show the setting in example 1 – ethermine.org. Open the website in your browser.
After choosing a pool, you need to select a wallet or exchange in advance. What is Ethereum Wallet? This wallet is located on your computer, coins are received on it, then you can withdraw them from this wallet through services to the card, which is not profitable at the moment. It is much more profitable to transfer coins into bitcoins, and then transfer them in rubles to a card, but this can be done on the exchange. But a wallet is much safer than exchanges, and I will soon be writing an article on how to create a wallet.
But beginners are better off working with exchanges.
- Binance — more professional exchange, good alternative to exmo!
- Exmo — great exchange, especially for beginners.
- Yobit — good Russian exchange.
– there are many of them, but we will start with the simplest exchange, then you will go to a more interesting exchange, I also advise you to read the list of good mining exchanges.
So, we have chosen the Binance exchange, after which we follow the link.
You will immediately go to the registration page. If so, then you can skip the next screen, and if not, then click “Sign Up”.
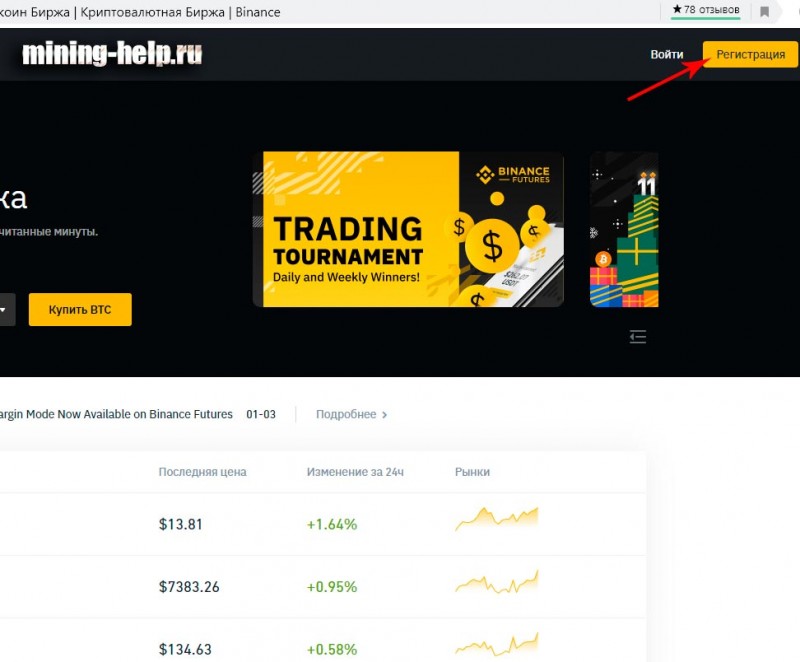
Registration on the Binance mining exchange
Further:
We register, enter your login, your e-mail address.
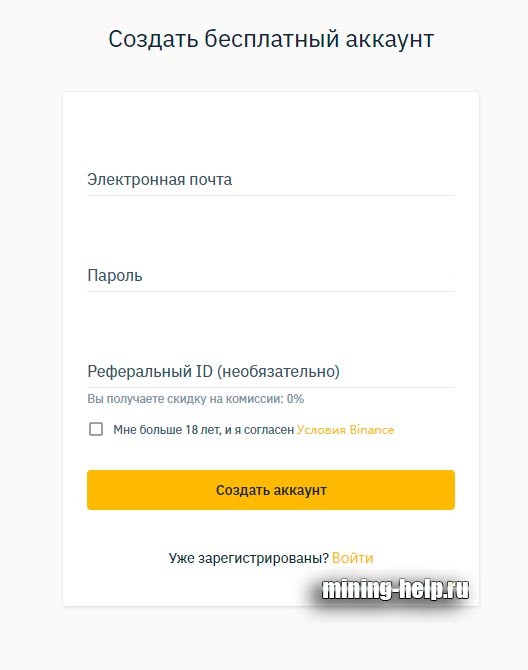
Don’t forget to click the checkmark that you are over 18 years old. The password must contain at least 8 letters and numbers, at least one letter must be capitalized. We press “Create an account”, solve the captcha and confirm the e-mail address, there you will need to enter the numbers that will come to your e-mail.
It should look like this
Next, we select the miner to start configuring the video card for mining. The most popular and functional miner at the time of this writing is Claymor’s Dual Ethereum 7.4, a new version 15.0 has appeared, suitable for both AMD and Nvidia video cards. Download here (15.0).
After you have downloaded, unpack the archive with the miner to a place convenient for you. The folder into which you unpack the archive should preferably be named in Latin (in English). This is the content you should get.

Now we start setting up the miner and mining.
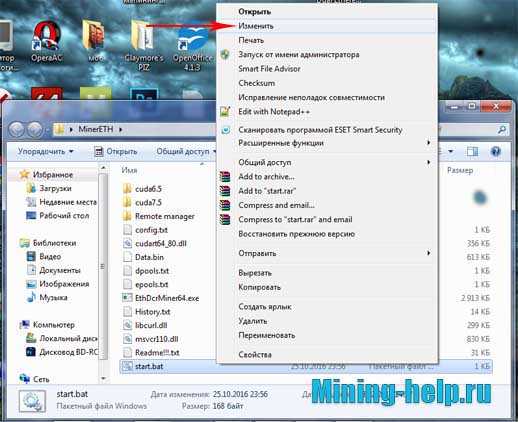
Next, the Start.bat file, right-click on it and select “Change”. If the “Run” button appears, click it.
Here is the code for our file that we will runn
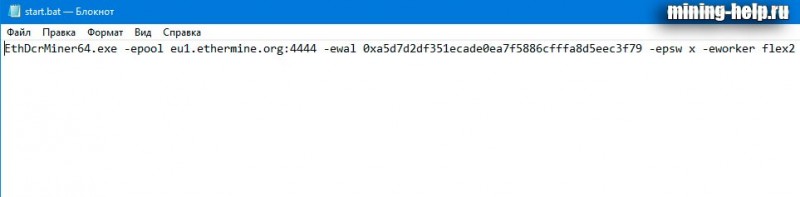
and we need to edit it for your pool and your wallet (exchange)
-epool, and after that we specify the pool address. Since we chose ethermine.org, we should have:
-epool eu1.ethermine.org:4444
(This is the address and port for mining, you can find information for other pools on the pool website)
Don‘t close the text editor
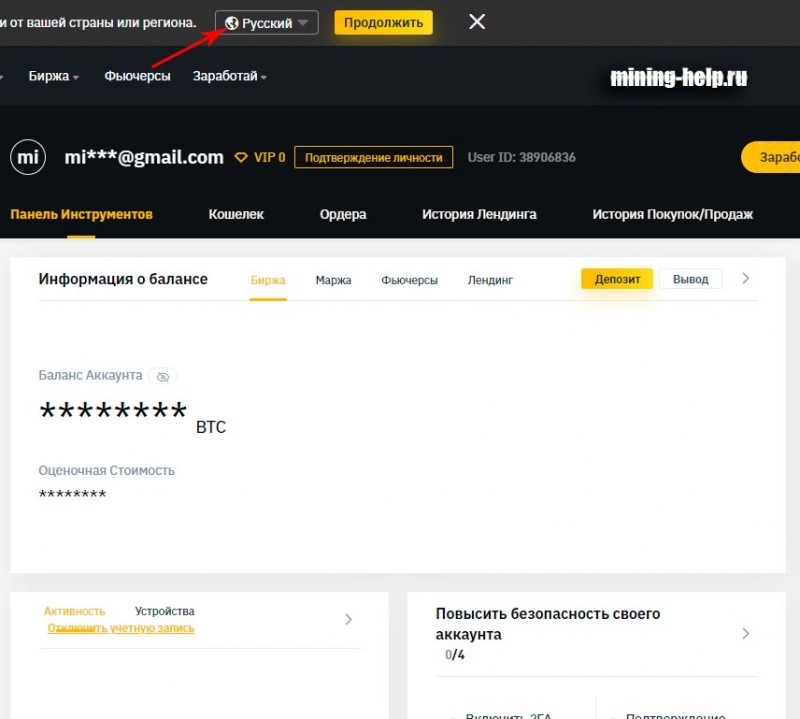
Next, we go to the Binance exchange, on which we previously registered. We enter with our username and click “Wallets” (gray arrow)

then we search for “eth” (circled in red).
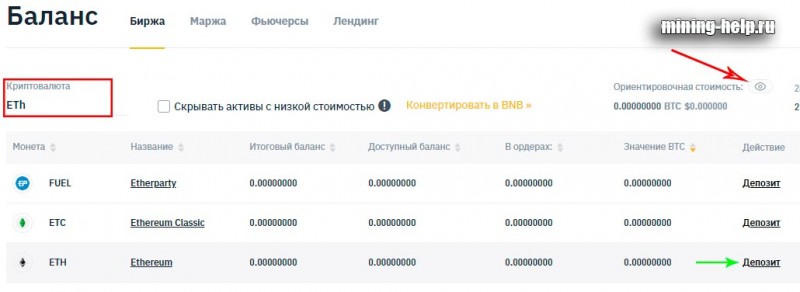
Next, we open the hidden balance for convenience (red arrow), then we click “Deposit” – green arrow and see the following:
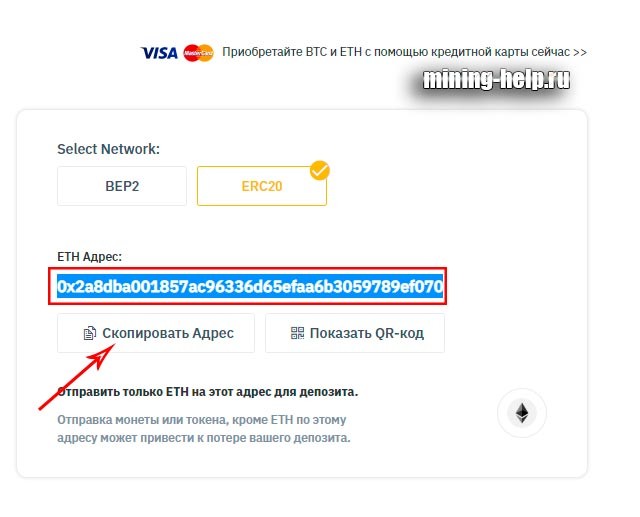
There will be a set of symbols (circled in red), this will be your wallet number, click “Copy address” (red arrow).
And we return to our test editor, after which we insert our address instead of someone else’s address in the -ewal line
Something like this
-ewal 0x2a8dba001857ac96336d65efaa6b3059789ef070
Then we see the following
-eworker flex2
Where “komp1” is the name of your worker, you can call it whatever you want, it is needed for ease of monitoring. At the end, add pause – this is necessary so that the miner doesn’t close if there are errors. We leave the rest unchanged.
It should look like this
EthDcrMiner64.exe -epool eu1.ethermine.org:4444 -ewal 0x2a8dba001857ac96336d65efaa6b3059789ef070 -eworker flex2 -epsw x
pause
only naturally with your wallet
Mining – how to start
now we run our start.bat. We are waiting for the time and see something like this
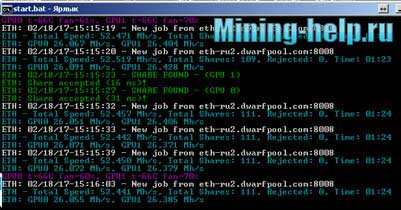
Eth mining has started. If you have any errors or something doesn’t work for you, write in the comments, I will help you.
Now go to the ethermine.org pool website. A little to the right there is a miner adress board (Statistics)
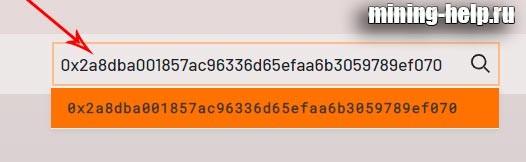
and enter your address there (which we copied from exmo and pasted into start.bat -ewal), press “enter”, and see the statistics of your worker. Attention, statistics appear in 5-30 minutes, depending on the mining speed.
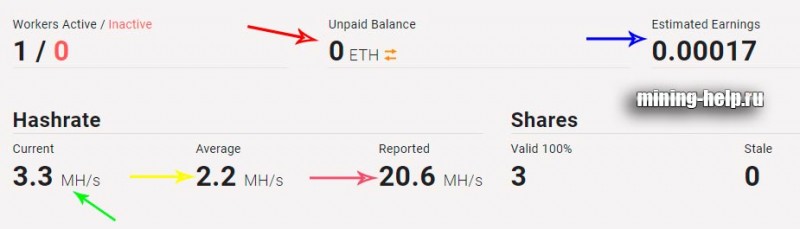
Unpaid balance (red arrow) – your balance in ether coins that have not yet been paid to the wallet in the exchange (one coin costs from $ 100 to $ 1000, depending on the exchange rate)
Estimated Earnings (blue arrow) – your approximate income, it shows correctly only after 24 hours of continuous mining.
Reported (pink arrow) – your current speed in the miner.
Average (yellow arrow) – your average speed over the last 6 hours. It will show correctly after 6 hours of continuous mining.
Current (green arrow) – your effective power for the last 60 minutes, correctly shows after 2 hours of continuous mining.
Next, we scroll down the page and see

Name – we previously configured the start.bat -eworker flex2. Here is a list of workers and miners running. In my case, 1 computer was started, where it says “last seen” – if it was started more than 30 minutes ago, maybe your miner is not working or the miner is disconnected, and you need to check. Usually, if you have problems with the miner (worker), then the background where the speed is shown is not blue, but red, as in the screenshot below.

Now you are mining ether. First, they will appear in the dwarfpool statistics, and after a while Ether coins will appear on the Binance exchange. The time they appear depends on the speed of your video cards. If there is only one card, you will have to wait a long time. Attention! Ethermine made an auto withdrawal of 1 Ether by default, which is a lot, but this can be reduced to 0.05 so that they come to Binance faster. Read about it here – Tomorrow we will write an article!
I hope that our step-by-step instructions on mining for beginners are clear to you, and if you have any questions, write. Now you can start making money on mining.
How to withdraw money from the Binance exchange to your card.
Don’t know how to withdraw? Read the article – How to withdraw funds to binance.
If you don’t have equipment, then I advise you to read – What you need for mining.
Also, if you don’t want to suffer with setting up and purchasing equipment, there is a solution – cloud mining – Reliable cloud mining.
If you want to mine bitcoin, then read – How to mine bitcoin.
Video of this article coming soon – How to create mining.
Mining in Russia is developing, so you too will develop with us in 2020. Good luck to everyone in mining, now you are not a mining beginner !!!
If your card is less than 3 gigabytes, then you can choose another algorithm, the list is here.
Write your questions in the comments.
Author: Admin
5 January at 4:48
Rate the article on a 5-point scale
Leave a comment (950)

No comments yet! But you can change that
More articles/news
30 June at 12:28
2281
3 September at 17:10
4390
2 March at 16:22
6223
Categories
Currency Rate
Miners Online

Be in the know!
We promise only interesting articles! We don't like spam ourselves :)